What is homebrew?
Homebrew is a package manager for MAC OS, so you can kind of think of it like apt or yum for Linux
systems or if you’re more familiar with Python it then you can think of this as being the PIP of the MAC operating system.
Homebrew allows us to install software using the command line in a nice and easy way. We can use this for installing software or setting up new machines.
How to install homebrew?
So, before we can install homebrew we need to have some command-line tools installed and we can install these easily through Xcode so in an open terminal you can install these by typing
Xcode-select --install
Once we have those installed we should be able to now install homebrew.To install homebrew type the below command in your terminal.
/usr/bin/ruby -e "$(curl -fsSL https://raw.githubusercontent.com/Homebrew/install/master/install)"
It’s a ruby command that’s going to run this Ruby script to install.
how we can use homebrew ?
We can test homebrew by typing
brew-help
and if it does’nt gives error and shows some list of commands then the installation is successfull.
list all of the packages
There are a lot of packages that we can install with homebrew.If you want to list all the packages that you can install with homebrew then type
brew search
If we wanted to narrow down those results and we don’t want to look through all of those list then we could pass in a string to brew search as well.
So let’s say that I wanted to install Postgres and wanted to search for that package so to do that I could simply type
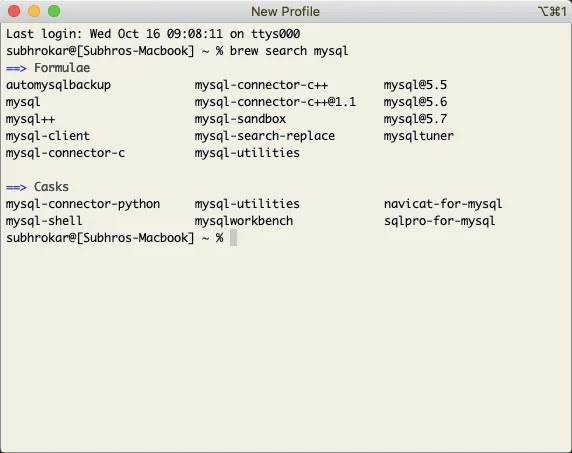
brew search mysql
When I run that it’s going to go out and search those packages and we will see that it returns a few results. So most likely to install MySQL I would use that formula of MySQL.
Note that, there are two sections listed out there. One of these is called formula and the other is cask.
Basically, formula typically deals with the command-line software and cask is an extension of homebrew that allows us to install mac OS native applications like google chrome.
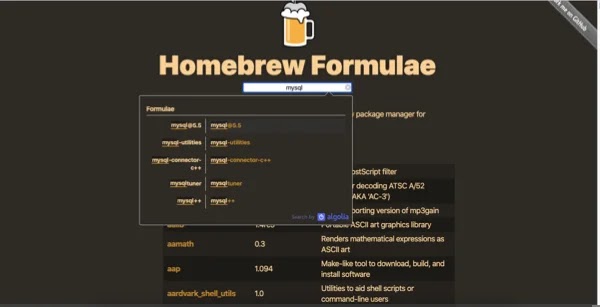
So that’s how we can search packages using brew but you can also view this in the browser as well
packages available here as well along
with a short description of each and you can also search this in the browser
Installing packages with homebrew
Let’s install mysql with homebrew and to install this with using brew we can simply type
brew install MySQL
This is going to install MySQL for us.
Where does homebrew and actually install these packages?
The Cellar is where Homebrew installs all the packages. The default path is /usr/local/Cellar.
It then adds a symbolic link from standard locations to it.
We can run the command which mysql and it will show us the path as /usr/local/bin/mysql which is actually a symbolic link. If you type the command as
ls -la /usr/local/bin/mysql, then you will see that the link points to cellar directory.homebrew is installing these packages is within this user local cellar directory.
Getting information about a package
If we want to see more information about an installed package then we can do that by using the info command as brew info MySQL.
It’s going to give us a description and where and when it was installed and also some analytic data now.
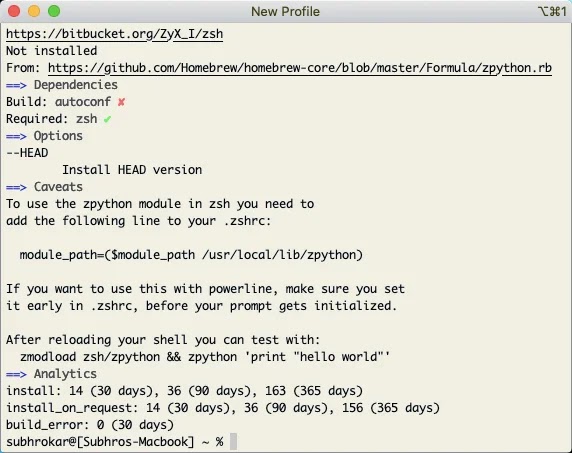
If you want to look at the info for an uninstalled package then it will show as not installed and it also tells
us what dependencies are needed.
Red cross here means that none of these dependencies is currently installed.
A green checkmark indicates the dependencies which are installed.
Uninstalling homebrew package
To uninstall any homebrew package we can simply run the command brew uninstall followed by the package name. So, if I have to uninstall MySQL, I can run the command as brew uninstall MySQL
Another, an interesting feature of homebrew is that we can use it to install new versions of certain tools that will overwrite max BSD version of the same tool.
For an example would be grep command which is the BSD version of grep and the grep in homebrew package is the Linux canoe version of grep.
So, if we install grep using brew that will it overwrite our mac default grep command? Well not really, but we could do that if we wanted to.
Al the commands will be installed with the prefix G.
If you need to use these commands with their normal names you can add the new bin directory to your path for your bash RC or in MAC’s case sometimes your bash underscore profile.
So the grep command is going to have a ggrep.
Using Taps to install packages from third-party repositories.
Let’s look at a few other things that you can do with homebrew sometimes with homebrew you’re gonna want to install a package that is located in a different repository.
So far we’ve only installed software from the core homebrew repository but we can add others so to
do this we can simply tap a repository and then install the packages.
A tap is a source of formulae. The default is homebrew/core and homebrew/core for cask.
For example, to use the Heroku CLI on MAC it’s easiest, in my opinion, is to install this using homebrew but first, we have to tap their repository.
If we type brew search and I was to search for Heroku then once this search is complete we will see it says no formula or Cass found for Heroku.
It didn’t find any formula or cask for Heroku.
So, in order to find that we first have to tap the repository so type brew tap and the name of the Heroku
the repository is Heroku.
You can find the repository name in its documentation website. So once we have that repository tapped,
do the same search so type brew search Heroku and this will return the results from their repository.
so if we wanted to install Heroku then type brew install Heroku and that’s going to go out and install that Heroku CLI.
Updating homebrew packages
Now let’s see how you to update packages. First, of all is to see what packages we currently have installed we can simply type
brew list
This will list out the packages so if we want to update we can type the command as below.
brew update
This will fetch the newest version of all of the packages including homebrew itself.
If we wanted to view the outdated packages we could type
brew outdated
This will show us all of the packages that have an updated version available then to actually update those outdated packages then we would then type the below command.
brew upgrade
By default, brew doesn’t actually uninstall old versions of a package so over time you night and keeps old versions of a formula for 30 days. To remove those you can simply run a command called
brew clean up
This will go out and remove all of the older versions of those packages so that might be something that you want to put into a cron job to run occasionally.
Troubleshooting homebrew
If you ever run into any problems with homebrew and need to check your system for potential
problems then brew also comes with a self-diagnosis tool that does this for you and that is called brew doctor. So, if you run
brew doctor
It’s going to diagnose your system and could let you know of any issues that it finds.
Install MAC applications with homebrew
This is one of the coolest things about homebrew. so far we’ve installed some command-line tools but we
can actually install Mac applications as well with homebrew extension called cask
Let’s say that we wanted to install firefox then we could type brew cask install firefox and that’s going to actually install Firefox.
I think it’s a lot easier than going out to the Firefox website and going through their setup and then dragging and dropping the application to your Applications folder and all of that this is just one easy
step to install this.
You can use cast to install all kinds of different software.
brew cask also has a search command just like brew has so if we wanted to install PyCharm we need to type
brew search PyCharm
If you’re not sure then you can run brew cask home on a package and it will take you to the home page of that software so that you’re sure of it.
Uninstalling Hombrew
If you no longer want homebrew on the system then uninstalling it is pretty simple. It’s just an another Ruby script just like a ruby script to install they also, have one to uninstall.
So you can copy the below code and paste in your terminal.
ruby -e "$(curl -fsSL https://raw.githubusercontent.com/Homebrew/install/master/uninstall)"
This would remove all the installed packages as well.
To conclude, I think this had covered most of the topics of homebrew and hopefully, now you have a pretty good the idea for how you can use homebrew on the Mac and can see why this is so useful.


Leave a Reply