If you have recently bought a raspberry pi 4 and don’t want to have a separate monitor, keyboard or mouse you can try a headless setup and access raspberry pi with ssh and VNC. This article will help you in setting up the Raspberry Pi 4 Model B for headless SSH access over WiFi using a Mac.
Before we start, let me tell you about some of the highlights of Raspberry pi 4
Raspberry Pi 4 has fast networking capabilities because of the fact that it comes with Gigabit Ethernet and built-in wireless and Bluetooth interface which means you need not purchase wifi or Bluetooth device separately.
However, if you want to setup raspberry pi as a full-fledged desktop computer then you would need a keyboard, mouse and monitor.
The small Raspberry Pi comes with 3 different variants of RAM – 1GB, 2GB and 4GB.
Your new Raspberry Pi 4 has upgraded USB capacity: along with two USB 2 ports, you’ll find two USB 3 ports, which can transfer data up to ten times faster.
The raspberry pi 4 uses a type c cable for power. There is 2 micro HDMI port to which you can connect 2 display simultaneously which also supports 4K resolution.
Now, let begin with the headless setup of Raspberry PI 4.
Step 1. Download Raspbian OS from the
I have used Raspbian buster with desktop. Once the download has been completed extract the contents from the zip file.
Step 2. Download the below tools to complete the installation process.
- SD Card Formatter– To Format SD Card
- Angry IP Scanner – To find the IP address of Raspberry Pi.
- VNC Viewer– To connect to Raspbian Operating System remotely.
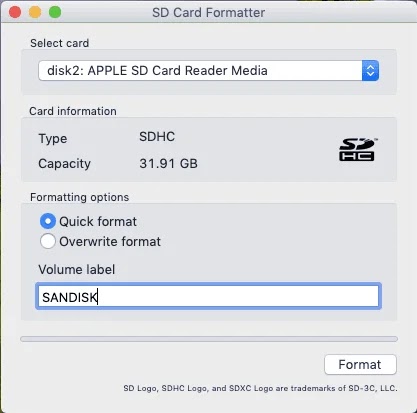
Step 3. Format your sd card with the sd card formatter
Make sure to use any class 10 micro sd card.
Step 4. Create a disk image of the Raspbian which you have downloaded earlier in the sd card.
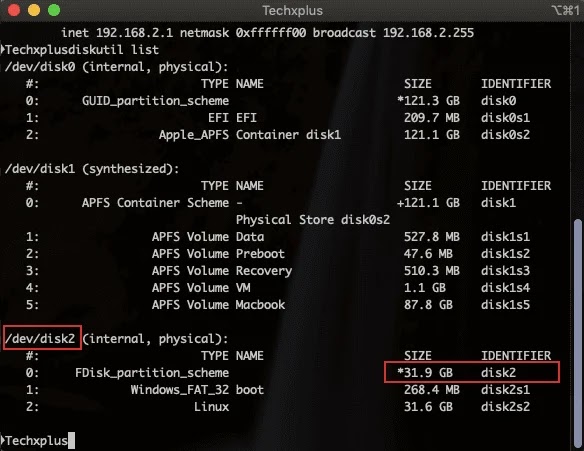
The first step is to, identify the disk number of your sd card by running the below command. This will show you the sd card disk number and BSD name. eg. /dev/disk2.
diskutil list
Then, Unmount your SD card using the below command:
diskutil unmountDisk /dev/disk2
Now, Copy the image to your SD card.
sudo dd bs=1m if=/Downloads/2019-06-20-raspbian-buster-full.img of=/dev/rdisk2
dd is a command-line utility in Unix and Mac based os. if= is the input file path. Replace the path inside “if” with your Raspberry Pi image path. of= is the Output file path. Make sure you provide the correct path with your disk number. This will take up some time, depending on the image file size. You can check the progress by sending a SIGINFO signal (press Ctrl+T). If this command fails, try using disk instead of rdisk.
Configuring Raspberry Pi for SSH and VNC
Open any text editor and type the below lines. Replace SSID with your wifi name and password with your wifi password. and save the file name as wpa_supplicant and extension as .conf.
country=IN
ctrl_interface=DIR=/var/run/wpa_supplicant GROUP=netdev
network={
       ssid="WifiSSID"
       psk="Password"
    }
The Country Code should be set the ISO/IEC alpha2 code for the country in which you are using your Pi.
Copy this file into the boot partition on your pi once, the file has been copied, the file moves to /etc/wpa_supplicant folder once the pi boots up.
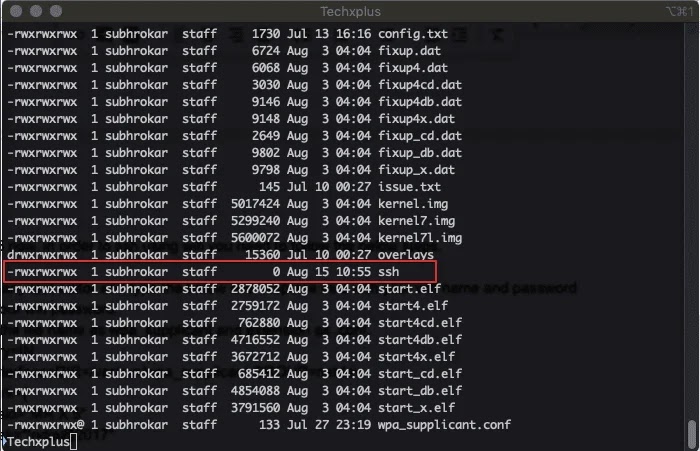
SSH is disabled by default in Raspberry PI. In order to enable ssh, you need to create a blank ssh file into the raspberry pi ‘s boot partition you need to locate the boot directory. In MAC OS, it is /volumes/boot.
Open your terminal app and change directory to the raspberry pi boot partition.
cd /volumes/boot
touch ssh
This will create a blank ssh file in the raspberry pi.
You can see the ssh file created. Congratulations! The Installation process of Raspian Operation System has been completed. Safely eject the SD card from your Mac and insert into the Pi. Power up the Pi by connecting the type c power cable with the raspberry pi and wait for the green LED to flash quickly.once it has booted you should be connected to your WiFi network.
Step 3: Find the IP address of Raspberry Pi
We need to know the IP address of PI before we can ssh into it. Open the Angry IP Scanner and click on the Start button to scan for IP address in your network.
Now, open your terminal and type
id="code-box">Ssh pi@192.168.1.6
Replace the IP address with yours.
Default credentials for Raspberry pi is :
Username pi
passowrd : raspberry
Step 4. Configuring Raspberry PI display and VNC settings
Once, you are connected to the raspberry pi, enter the below command to configure some of the important settings.
Sudo raspi-config
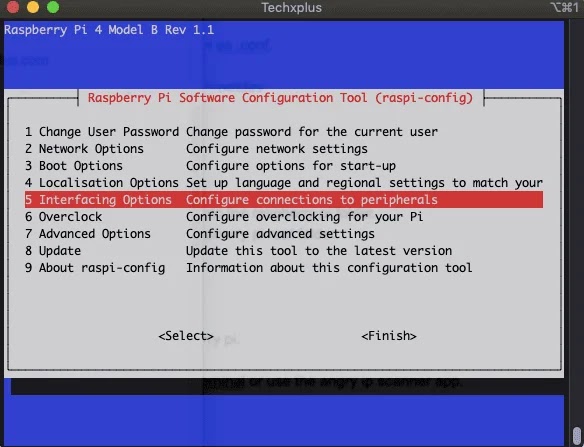
You will see a blue screen with options in a grey box in the centre.
Using the Up and Down arrow key will move the highlighted selection between the options available and Pressing the right arrow key will jump out of the Options menu and take you to the <Select> and <Finish> buttons.
Pressing left will take you back to the options. Alternatively, you can use the Tab key to switch between these.
You need to select INTERFACINGOption from the list.

In the next screen Select the P3. VNC option.
Select yes to enable VNC server.
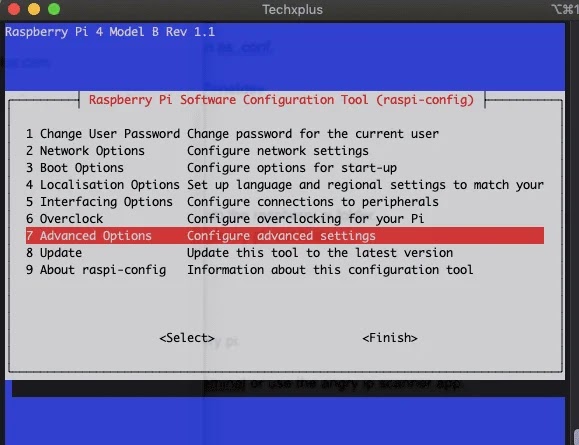
If you see a blank screen after connecting to raspberry pi in VNC viewer, you may need to configure the resolution. To select the resolution to select the Advanced option.
Select the resolotion as DMT MODE 82 1920×1080 16Hz 16:9 and select Ok
Step 5. Open Vnc viewer and enter the raspberry pi IP address and credentials
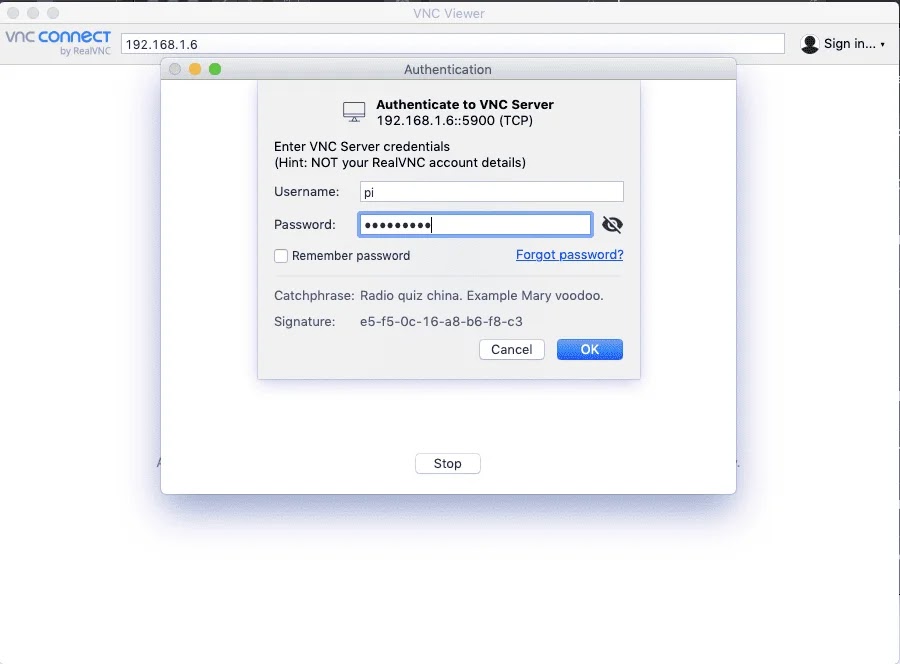 That’s it! Your Raspberry Pi setup is now complete. If you wish to log in to raspberry pi without entering a password, then do check out the below article.







Leave a Reply